You can export video in Symphony Video (.aira) or AVI format.
Using Search - Also provides the MPEG format option.
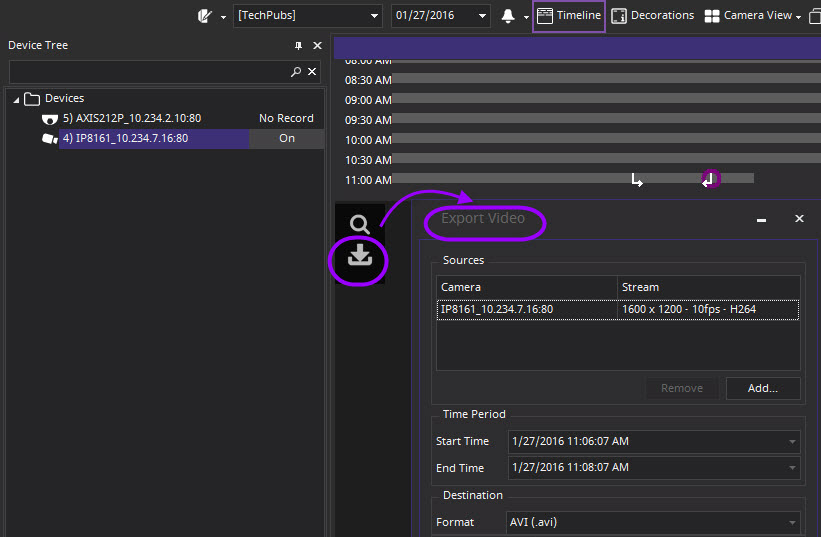
Click in the panel to display the Export icon.
Task 1: Select a point on the Timeline
By default, Symphony sets parameters for a video clip to start 60 seconds before the selected time, until 60 seconds after the selected time.
You can change these settings as necessary in the Start Time and End Time fields.
Notes: • If you create an END point to the left of the START point, the START will be removed before the END is created. • If the cameras are changed after a selection is made, the END point is removed. • If you select a Start and End point from the Timeline first, the Video Export dialog box displays corresponding Start and End dates. • If you do NOT first select Start and End points in the Timeline, but open the Video Export dialog box, the Start/End arrows will be created in the Timeline +/- 1 minute from the current selection. Arrows in the Timeline will match the Start/End dates shown in the Video Export dialog box. • In Live View, if you first launch the Video Export dialog box, only the Start point arrow will be displayed in the Timeline. The End point arrow will appear in the Timeline after a minute, that is, when time has passed and the Timeline shows a historical moment. • If no End point is selected, Symphony displays an End arrow on the Timeline two minutes after the Start arrow • If no Start point is selected, Symphony displays a Start arrow on the Timeline two minutes before the End arrow. • Symphony saves the format and destination of your last export within a session. |
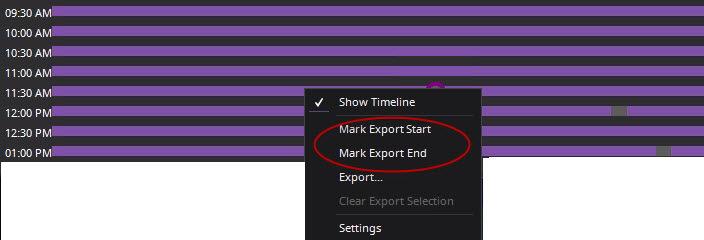
1. Right-click a starting point on the Timeline and from the context-menu select Mark Export Start.
2. Right-click an ending point on the Timeline and from the context-menu select Mark Export End.
3. Click the Export icon. The Export Video dialog box opens.
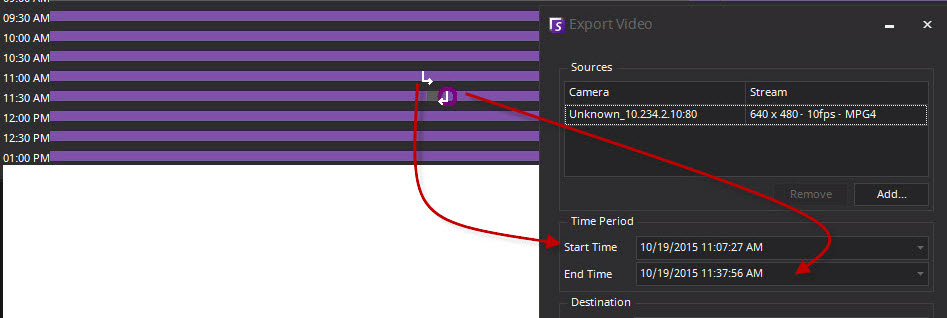
4. The points in the Timeline are displayed in the Start Time and End Time fields in the Export Video dialog box. Once the Video Export dialog box is open , if you change a Start Time or End Time in the Video Export dialog box and click outside the date control fields, the arrows in the Timeline will change to reflect this. (However, each time you change the start and end points in the timeline, the Start Time and End Time fields in the Export Video dialog box are NOT updated.)
Task 2: Select cameras from which to export video
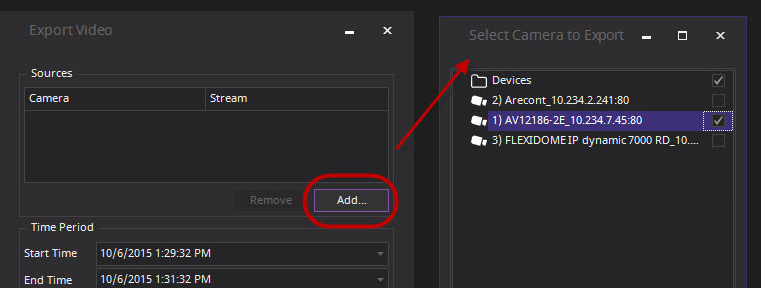
1. In the Export Video dialog, click Add. The Select Camera to Export dialog box opens.
2. Select the check box associated with the camera(s) and click Add.
3. Select Symphony Video (.aira) or AVI from the Format field.
• AVI - the Export Video dialog box expands to display more options.
• Symphony Video (.aira) - select the Include Symphony Player check box in which case Symphony Player and associated files are included in the export folder (Desktop\Exported Video).
4. (Optional) By default decorations are included on the exported video. You can clear the check boxes to remove the decorations.
5. By default, Video and Audio Codecs are selected. Use the drop-down lists to select other codecs that are installed on your Windows system.
6. By default, audio is exported. To exclude audio, clear the Export Audio check box.
7. By default, the video file and a log file will be saved on your Desktop (Desktop\Exported Videos). If necessary, change the location of the saved files by altering the path in the Destination Folder field.
8. Split Files at - You can select file size segment: 10, 100, 640, 700, or 2000 MB. You can also enter any value in the field between 2 and 2000 MB. Files are created by default in approximately 640 MB segments.
9. To protect the exported video file with a password, select Password Protect and then type and confirm a password.
10. Click Export. A message is displayed indicating that your file has been saved. You have the option of opening the directory where the video file has been stored.
The video filename is saved as <CameraName> - <Capture Resolution> - <Capture FPS> - <Capture Format>_YYYYMMDD_HHMMSS with the .avi or .aira extension. The date and time reflects the start of the recorded clip.
The video log file is named in the same manner as the video file but with a .txt extension. The exported video file contains an MD5 checksum (a digital signature). It is used to verify that the video file has not been altered.
To verify the checksum, you must run md5sum against the video file and verify that the number matches the value in the log file. See the Knowledge Base for instructions: http://www.aimetis.com/Support/kbarticle.aspx?ID=10086
Consecutive files have a timestamp that represents the start of that file.
Video Playlist for Large AVI File Export
When exporting a large file into segments in AVI format, a playlist is created.
1. Open the M3U file in Windows Media Player. The files play in order, one after another.
2. In Library mode in Windows Media Player, you can click Play to view the list of AVI files.