Camera View layout allows you to view multiple camera views at the same time. You can configure Symphony to display 1 to 25 cameras at once. You can have more than one multi view dialog box open.
Since Camera View layout is made up of individual Video Panels, it is possible to configure them individually for appearance, the activities to perform upon alarm events, whether or not to have Timelines, Navigation Bars, etc. The behavior of each video panel can be customized (Customizing Video Panel Properties).
In Symphony version 6.9 and prior, Camera View layout is referred to as Multi View.

Depending on the default setting in your Client Settings, a camera view can open as a floating view or a docked view. For default settings, see Client Settings, specifically the tab with Camera View.
To load a Camera View display:
1. In the Menu toolbar, click one of the camera view icons (1, 4, 6, 9, 16, 25). Depending on the default setting in your Client Settings, a camera view can open as a floating view or a docked view.
1. (Optional) To switch between a default view (either docked or floating view), press the Ctrl button on your keyboard and with your mouse click the desired camera view icon (1, 4, 6, 9, 16, 25).
2. Drag cameras from the Map panel or Camera Tree panel onto panes in the camera view.
To save your currently configured Camera View for later use:
1. Click the Save icon in the Toolbar. The Save As dialog opens.
3. Select the New View option and enter a name for the view in the adjacent field.
4. Click OK to save the camera view.
To load a saved Camera View (multi view):
• From the View menu, select Load Camera View Layout, and select a named view.
or
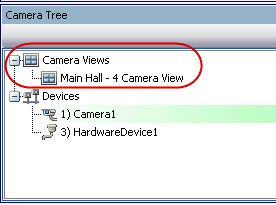
• Click on a named camera view in the Camera Tree.

Floating Camera View windows are typically used where the operator has more than one monitor. A floating camera view can be dragged to the second monitor.
• From the View menu, select Floating Camera View.
• From the View menu, select Docked Camera View.