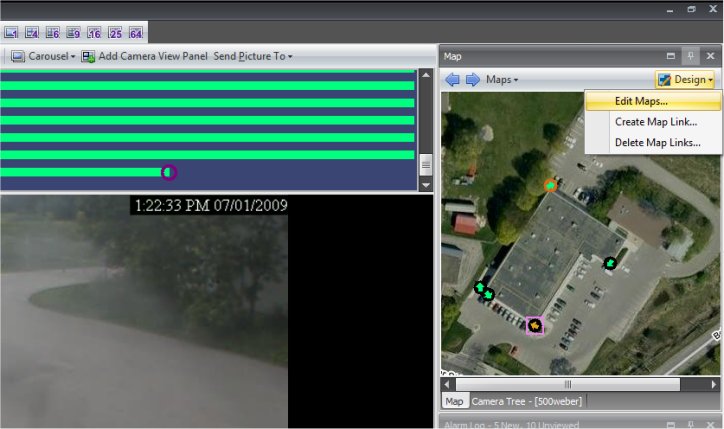
Aimetis Symphony allows you to upload an image (jpg, gif or bmp file) to be used as a map for your server. If the Map is not visible in the Main Console, click View > Map Navigation.
To customize or change the Map, click Design and Edit Maps.

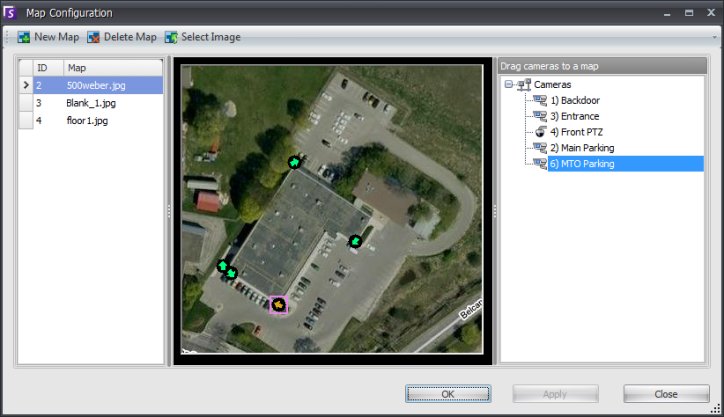
After clicking Edit Maps the Map Configuration dialog opens.

In order to customize the Map, follow these steps:
To over-write the default map, select the map and click the Select Image. Alternatively, right-click the map name and click Select Image.
Browse for the image file you wish to use for the new map (jpg, gif or bmp).
After you have finished uploading a new map, drag your cameras to the map to place them on the map. No cameras are added to the map by default.
Right click on a camera and select Rotate Map Icons to position the camera angles as required.
Click OK to save settings.
In larger sites where you wish to have more than one site map, you can layer site maps by making them hyperlinked by creating hotspots on the map. In order to do this, upload your main map using the steps outlined above and perform the following additional steps:
Make sure you have at least added two maps using the steps above. Place the cameras to the appropriate map using the steps above.
Click the Design button and select Create Map Link. The Create Map Link dialog appears
Click on the Map Link pane on the left to create a hotspot. When users click on this hotspot, it will load the map on the right pane.
Select the colour or transparency of the hotspot and hit apply.
Finally, select if you wish to link to another map on the current server, or to a map on a different server. It may be useful to link to a current map on the server if you have many cameras and the main (default) site map does not show enough detail. In this example, by creating a hotspot over the parking area, we can create a blown up image of the parking area for more detail.
See Also