Overview
The VE150 Algorithm is a good choice for outdoor motion tracking applications in non busy environments. The algorithm has the ability to classify the difference between people and vehicles, and can detect if the object is stopping, starting, or simply moving through the scene. Alarm rules can therefore be designed around these features. Typical deployments include commercial buildings, where people or vehicles are to be detected, military bases, where objects entering an alarm zone or crossing a pre-defined perimeter should be detected, or for car dealers and construction sites, where full time security guards are not a cost effective approach to detecting people or vehicles after hours. The VE150 Algorithm will produce far fewer false alarms caused by a changing outdoor environment as compared to normal "motion detection" algorithms.
Working Scenarios
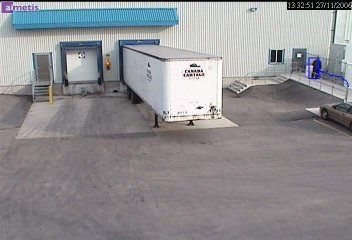
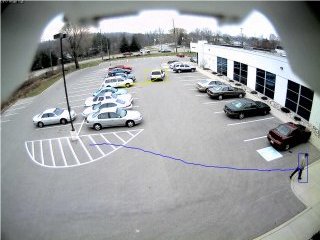
The VE150 is a good choice in outdoor environments, which are not too busy, where people or vehicles are to be tracked and classified. Robust object segmentation is typically not important in VE150 working scenarios (meaning detecting two objects as one object would not be considered a problem, since an alarm would normally occur in either scenario). Camera position should normally be one or two storey's off the ground, and the camera angle should be between 30-45 degrees. Typical views of environments where the VE150 algorithms has been optimized is shown below:


VE150 Analytic Configuration Steps
By default, the VE250 analytic is applied to a new camera added to AIRA. Configure the camera to use the VE150 (see how to select analytics for more help).
Click on the Analytics Config from Server > Configuration. Modify the Motion mask by clicking Motion Analysis from the combo box and adjusting the yellow mask as required (see how to configure analytics for more help). Select the Exclude Area radio to erase the yellow mask, and select the Include Area to draw the mask. The Size slider adjusts the pen thickness.
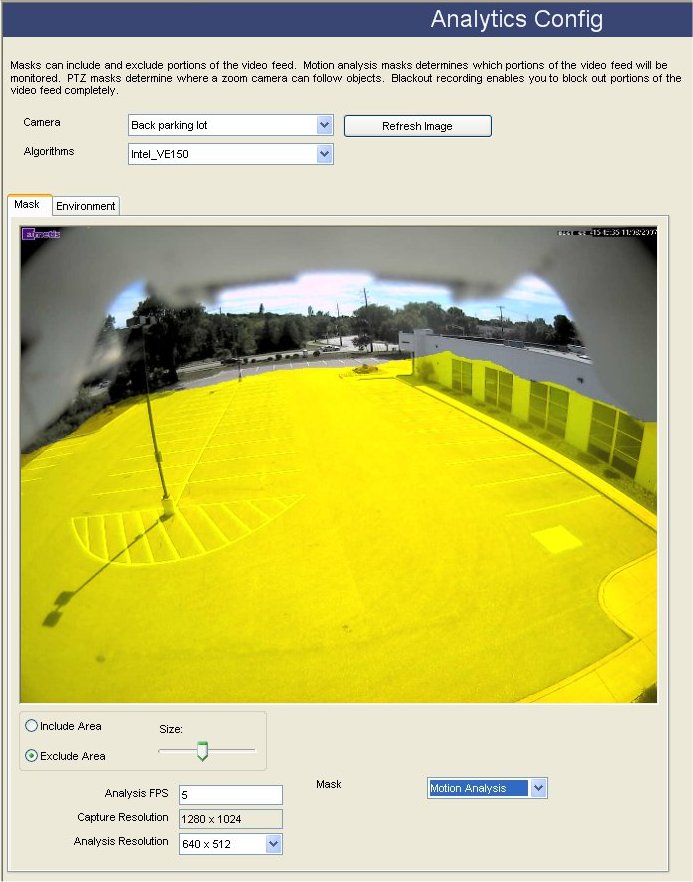
The Analysis Resolution can be adjusted as required. Setting the Analysis Resolution the same as the Capture Resolution ensures that objects will be detected as far away as possible. However, in order to conserve CPU resources it is possible to downsample the video sent for analysis. Downsampling will reduce CPU requirements but may also reduce the detection range of the video analytic.
The Analysis FPS box configures how many frames will be analyzed by the system. Typically the default value should not be altered. However, there may be cases where the analysis frame rate can be reduced to conserve CPU. Doing this may negatively alter the algorithms performance. Like the Analysis Resolution, the Analysis FPS can be set differently than the record FPS.
Next, click Perspective from the Mask combo box to set Perspective information.
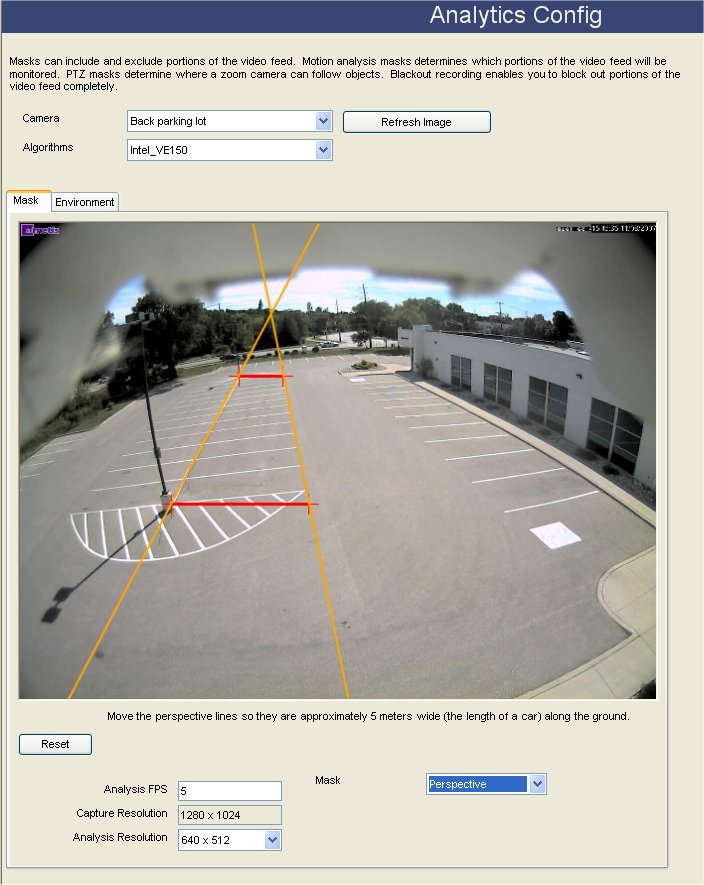
Click on the end of a red line and drag it larger or smaller as required. Click on the edge of the other red line and drag it larger or smaller to resize it appropriately.
Click OK to save changes and create a Policy to alarm on VE150 motion tracking events.
Other configuration (optional)
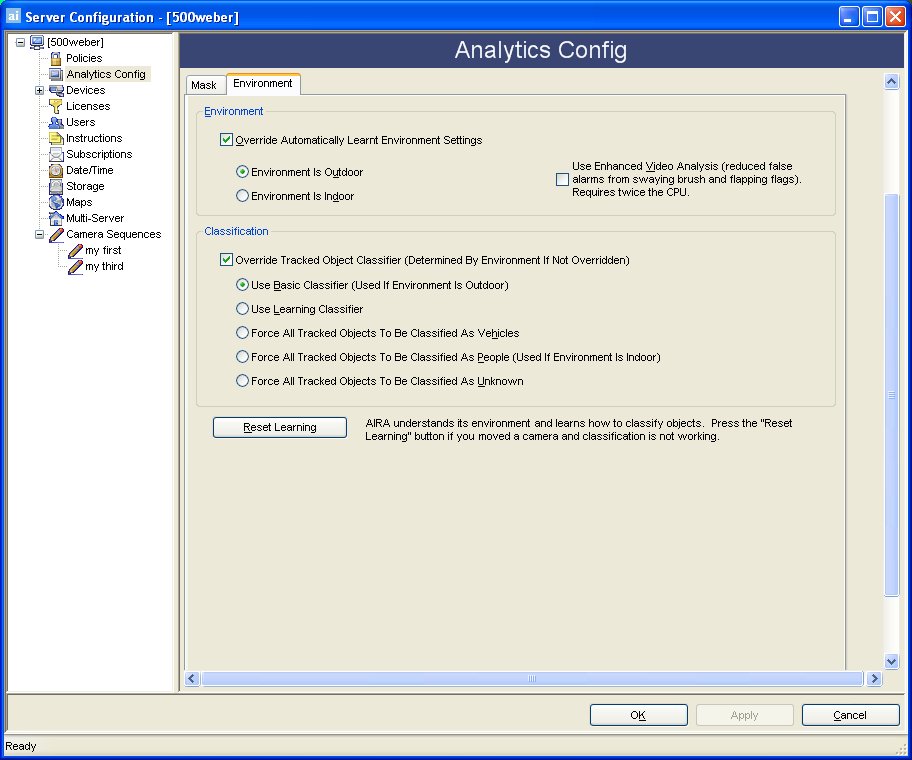
Ensure the Perspective and Motion mask is set properly before modifying the Environment tab. If many false alarms occur due to moving trees or reflections, consider using Enhanced Analysis mode (CPU requirements drastically increase).
Usage:
Use Enhanced Video Analysis Selecting this may decrease false alarms caused by reflections or moving trees but will also increase CPU usage.
Classification Select advanced options for the analytic.
Reset Learning If classification is not performing properly, reset learning may improve classification.
VE150 Alarming Configuration Steps
Configuring the analytic (see above) is required before Policies using the VE150 can be created. The VE150 has the following options for alarm triggering in a Policy:
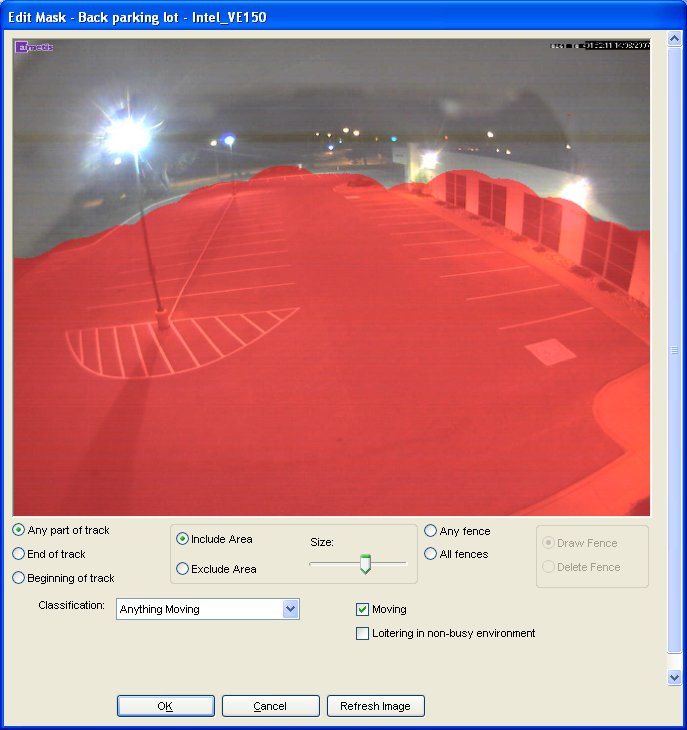
Define the alarm zone(s) in the image. Two options are available for configuration: Alarm Mask or Fences. (Note: Alarm Mask and Fences can be configured for the same camera by creating a new Policy).
Alarm Mask
Click the Include Area radio button (see above) and paint over the area you wish to be included in the alarm zone. Note: The Alarm Mask (red area) needs to be included within the Motion Mask.
Fence
Click the Any fences radio button (see below) and draw a line or multiple lines. The arrows define which direction the offending object must pass through the line(s) in order to cause an alarm. Double click the arrows to change their properties. Red indicates an object crossing the line in this direction will cause an alarm while the green arrow denotes the object crossing the line in this direction would not cause an alarm. Multiple fence lines can be drawn. If All fences has been selected, the object must cross through all fences drawn to cause the alarm.
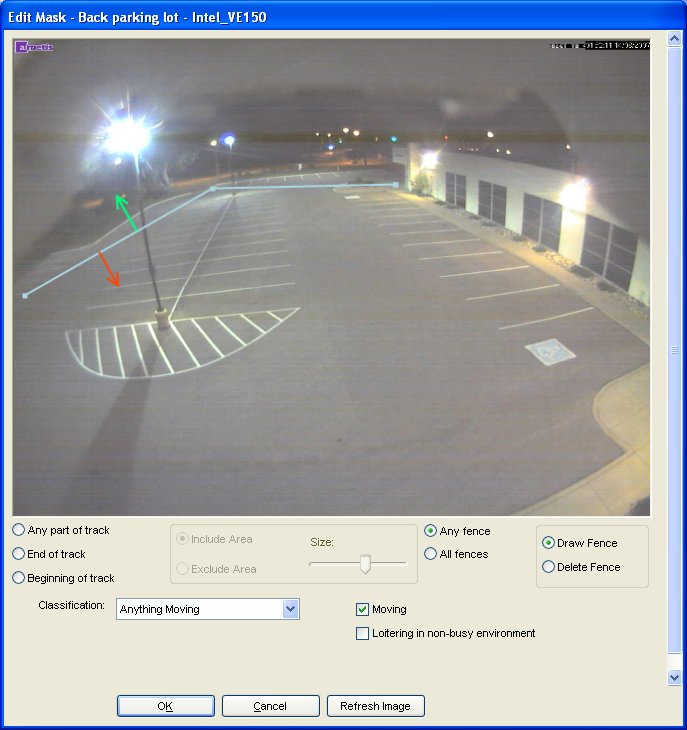
The Classification
combo box specifies the class of object that is required to be
detected to cause the alarm. Normally alarming on Anything
Moving is adequate in most cases. Only specify specific classes
of objects if required.
Any part of track,
End of track, Beginning
of track. Usage: Any part of track denotes the object can be any
where in the red alarm zone to trigger an alarm. End of track denotes
that the object has stopped in the alarm zone. Beginning of track denotes
that the object started moving in the alarm zone. For example, if you
wanted to alarm on vehicles moving anywhere in the alarm zone, select
Any part of track. If you wanted to alarm on vehicles entering the alarm
zone and stopping in it, select End of track. If you wanted to alarm on
vehicles that were parked in the alarm zone and started to move, select
Beginning of track.
Click OK and
move to the Actions dialog of the
Policy process.
Further notes
In typical situations, the VE150 can detect a person 120 feet from the camera, a vehicle 200 feet from camera (assuming 4CIF or 640x480 and adequate lighting conditions).
Keep the camera lens clean from rain droplets or bugs. Rain droplets hitting the camera lens directly will cause false alarms. Bugs will do the same. If a spot light is installed too close to camera, it will attract bugs.
The camera must be stable, if wind or vibrations causes the camera to move, false alarms will occur.
This algorithm does not perform well indoors, or where the objects are very close to the camera, or if the environment is very busy.
The CPU requirements are less than the VE250.
Troubleshooting
Ensure the correct frame rate is being utilized, and that enough CPU is available on the system to perform proper analysis. V
Verify that perspective has been properly set.
If nuisance false alarms occur by trees or reflections, enable the Enhanced Analysis mode. If problems still persist, contact Aimetis for support. Have sample video showing problems available for Aimetis support specialist to review.
See Also